Credit Builder Card Embedded Documentation
Please note: If your company is integrating our Card product using embedded pages, you’re in the right spot!
Overview
Upward provides a seamless and secure way for businesses to enable a credit building card to their end users. End users can incorporate credit building into their daily activities by loading money to their FDIC insured DDA account and then swiping their card at any location where Mastercard is accepted. Upward’s platform customers are able to monetize the card through interchange, deposit interest, and expedited external payments.
Introduction
Welcome to the Credit Builder Card! Our documentation will walk you through the basics (authentication, request structure) to using and creating the financial products associated with the Credit Builder Card (accounts, cards, payments, etc.).
The introduction covers basic concepts you should be familiar with in order to make the most out of the Upward card issuance and management platform.
How the Credit Builder Card Works
- The card’s available credit is equal to:
- the available funds that the user maintains in a linked deposit account, plus
- any verified incoming payments to the user, such as payments due for wages or gig work
- The user may obtain a physical, digital card or both. The user makes purchases anywhere Mastercard is accepted.
- As the user makes purchases on the card, an equal amount of funds in the linked deposit account are put on hold, and the card’s available credit decreases in an equal amount.
- The cardholder may opt in to automatic payments to pay off balances as they incur charges, but must pay the card’s balance in full on the payment due date.
- If the balance is not paid on time and the DDA balance is at zero the card will freeze until the user has made a payment.
- By default, there are no fees to use the card and the user is charged 0% APR.
Implementation Options
Upward offers three ways to integrate the credit builder card into your website or mobile app for your credit program.
- Use Credit Builder Card APIs. When integrating credit builder cards into your own website or app, this option offers flexibility in designing a unique user experience including the credit services and financial products you wish to offer. This option provides a secure, PCI-compliant, customizable experience for purchasing and providing basic banking services (i.g statements, transaction, history, card management, etc).
- Use our Embedded Integration. The embedded flow is a drop-in module that enables you to seamlessly offer a credit builder card within your app or web page. It allows individuals to easily access their credit and credit builder card details securely without redirecting away from your app or website.
- Leverage an Upward Hosted App. If you do not want to build and host a credit account and banking experience, Upward can handle the product build and push to your app store instance. This approach offers less flexibility and, while easier to implement, it requires higher platform fees.
Environments
There are two types of environments for the Upward Credit Suite:
- Sandbox
You can test out your integration and explore common usage patterns in our sandbox environment. This environment is fully isolated and will not perform any “live” financial transactions.
You can request sandbox access once you have a signed contract.
Important: The Sandbox environment is fully secure, but you should not store any real consumer data here.
- Production
Once you have completed sandbox testing and submitted your test plans, you will be provisioned production access keys. These details will be shared with you via a secure sharing mechanism. All transactions in our production environment are live financial activity.
Getting Started
Regardless of which method you choose for integration you will always need to follow our authentication methods.
Authentication
Upward’s API uses OAuth 2.0 to authenticate requests. All API calls must include a token. These authentication tokens are used for machine to machine communication.
Note: An invalid, missing or expired token will result in an {invalid_token} response
URLs
Environment URL Sandbox Authentication https://auth-sandbox.upwardli.com/auth/token
Production Authentication https://auth.upwardli.com/auth/token
Tokens
Upward has the concept of three different tokens:
- Customer Onboarding Tokens: are system level and assigned to a specific organization that allows you to onboard new users. Once a user is onboarded you would use the customer token to access their specific information.
- Customer Access Tokens: are specific to an end user also known as consumers in our product and only provide data specific to that consumer. These tokens are used to secure our embedded components.
- Partner API Tokens: are highly secure tokens that are used to integrate your backend platform with Upward’s APIs. These tokens SHOULD NOT BE USED OUTSIDE OF DIRECT API CALLS BETWEEN YOUR SYSTEM AND UPWARD.
When a token is created, it is assigned a set of Scopes. The scopes define the resources that can be accessed using the token, and the access level (read/write) that will be allowed using that token.
NOTE ON TOKEN EXPIRATION: Partner API Tokens expire after 10 hours have elapsed since creation, and Customer Access Tokens expire after 1 hour
If a new token is not requested then it will result in a 403 screen.
Scopes
Scopes define the access level of a token.
A list of all scopes within Upward:
Embedded Component Endpoints
The Credit Builder Card API provides access to several different types of detail.
You decide which of the experiences you want to include:
Requesting Tokens Using The API
The Upward API uses OAuth 2.0 for authentication and authorization. Before you can use the API, you must obtain an access token using the client_id and client_secret provided to you. Once a token has been obtained, it must be passed in the Authorization header of each request to the API.
Customer Onboarding Token Request
To request a token send a POST to our auth server containing your client ID and client secret values.
POST https://auth-sandbox.upwardli.com/auth/token/
Here’s a cURL example for the token request:
Here’s what a successful response looks like:
Exchanging Partner API Token for a Customer Token
Once a valid token has been obtained using the Authentication API, a limited scope token can be obtained using the token exchange API. This token can be used to make requests for a specific consumer, and is safe to send to the client application/web browser as needed.
To request a token exchange send a POST to our auth server containing the access_token and requested scope.
This token expires after 1 hour and will need to be exchanged for a new token for the customer to continue to have access.
Notes:
- The audience must be for the correct Environment.
- Sandbox:
https://auth-sandbox.upwardli.com - Production:
https://auth.upwardli.com
- Sandbox:
- The upward_consumer_id is the Upward id that you get from the Consumer API or the
consumer.createdwebhook. - The new access token is a significantly longer string than the original access token.
POST https://auth-sandbox.upwardli.com/auth/token/exchange/
Here’s what a successful response looks like:
Onboarding a New User
A consumer is the individual end user that you are creating a credit product. Consumers are limited to individuals using a valid SSN or ITIN, or single-member LLCs (coming soon).
A Consumer record is automatically created once an application is started and Upward will manage the ongoing regulatory requirements tied to application notice, approval and denial notifications to the end user.
Consumer onboarding is a fully asynchronous process due to the KYC and Banking integrations, which are themselves asynchronous. Our design goal for customers interacting with the Onboarding component is to capture data in realtime, and then process asynchronously. This will reduce elapsed consumer interaction time and improve the customer experience.
NOTE: we recommend listening to webhooks. to be notified of the status of each consumer as they make their way through the application and approval process. You will have access to the consumers financial products once they have been fully onboarded and approved.
All consumers are created as part of our onboarding. Regardless of the integration method you’ll need to use our embedded iframe to offer our application flow. We do allow you to customize the UI of the application but to ensure consistent and fair lending practices we own the specific language and disclosures surrounding the application process.
Authentication & Loading the Onboarding Embedded Flow
AuthenticationTip: Your API Key and Secret will be shared with you by your Upward client team.
The first step in integrating your product is to configure authentication. All Upward components and APIs require Oauth tokens for access.
Important ParametersNext, you load the onboarding embedded component in your app using URL below and the a Customer Onboarding Token with the ui:client-onboarding scope.
When you load the onboarding embedded component, pass in the PCID property (your unique ID) as a query parameter and be sure to include the correct access token.
Once the consumer clicks “Get Started”, the UI component creates their consumer record using the Consumer API endpoint. The user’s pcid will be set to the value you provide us, and we will generate a unique id on our side to identify this record internally and within our APIs.
Upward sends out a consumer.created webhook message to your server. The Upward Servers will send a webhook message to you with the following general schema, indicating that the consumer record was created on our side.
You Link the Upward ID to your Local Object. Upon receiving the webhook message, you will parse it for the eventName property and determine that this message means that a new consumer was created. You can then call the url in the resources property to get information about that consumer.
Example of output via API - assuming the consumer stopped before complete KYC and that you did not pre-fill any data for that user.
NOTE: At the time of creation, the user has not completed KYC, so their personal data has not been captured and will be null in the response body.
Example
The following is an example of how to load the onboarding UI Component in a react native application.
Onboarding Flow UI Specifics
The details below outline the flow of onboarding a consumer:
- Get Started
- Create Consumer
- Accept Terms, and
- Ordering a Card.
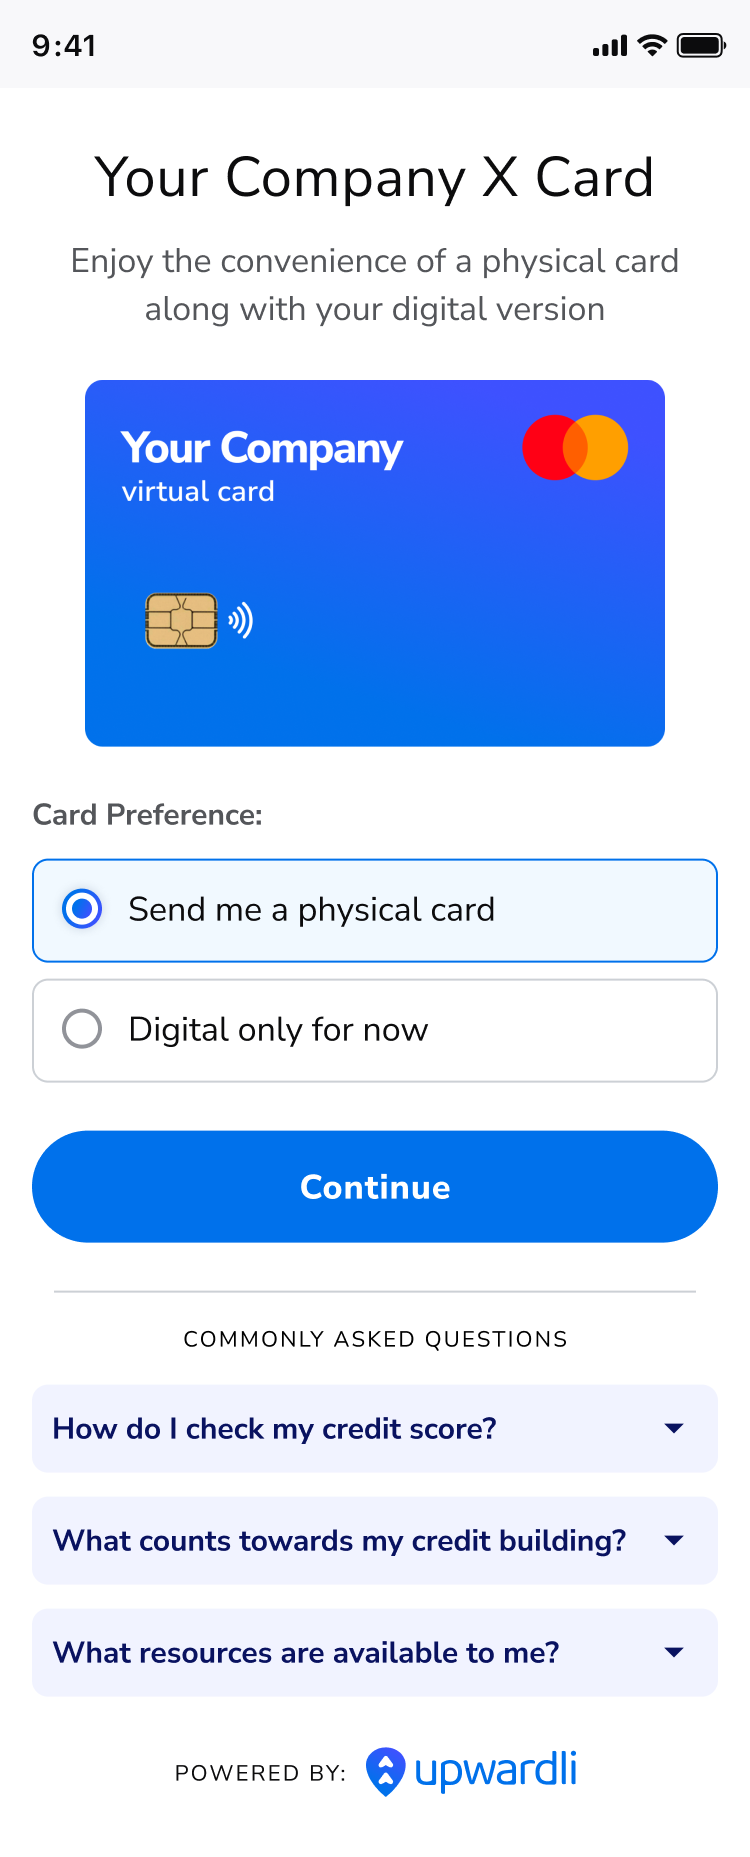
Step 1: Get Started
Each consumer will see an entry screen that will highlight the value props and also include the appropriate disclaimers for the product.
Step 2: Create Consumer
The create consumer step is where we will initiate a consumer record, collect and verify KYC details, as well as complete required PEP and OFAC scans.
We provide the option to pre-fill data for your consumer to reduce onboarding friction. If you want to pre-fill data for your consumer see the section entitled: “KYC Data Pre-Fill” below.
Consumer Completes the KYC step(s)
Once the user has successfully completed KYC, then we will send a further webhook with an event_name of consumer.updated
When you retrieve the updated consumer record related to this webhook, you will see that the kyc_status value has changed to "kyc_status": "Complete", indicating that this consumer has successfully completed the KYC step. In some cases, we will need to complete a manual review of the information provided by the consumer.
This webhook will also allow you to see the KYC information that was provided by the consumer when completing this step. We do not provided the full tax_identifier.
NOTE: KYC completed does not mean the consumer has completed onboarding or that a card product has been provisioned.
TIP: If you do not receive the webhook you can call the Consumer endpoint to retrieve the consumer details.
Optional: KYC Data Pre-Fill
Before loading the embedded component, you can pre populate data for a consumer by calling the api: POST: https://api-sandbox.upwardli.com/v2/consumer/ and providing the following fields:
If you are pre-filling you will need to use the xx token with xx scope to correctly send the details. You can also partially send information, however, you will always be required to send the PCID field.
Edge Cases / Unhappy path:
- If a user does not complete KYC, then you will only receive the consumer.created message
- If a user fails KYC, then we will send a consumer.updated webhook, with a kyc_status value of Failed. We will not open a credit line for any users who do not pass KYC.
Step 3: Accept the Credit Card Terms
A user will naturally be sent through to accept the terms of the product -
**However** if a user doesn’t complete KYC or drops off during the signup process, you can restart the session by sending a new unexpired token with the PCID for that consumer and the the correct scopes for accessing onboarding. This will ensure the consumer is dropped back to the right portion of the app.
Example:
https://component-embedded-sandbox.upwardli.com/en/onboarding/card-product/?pcid= {$partner_consumer_id}&access_token={$access_token}
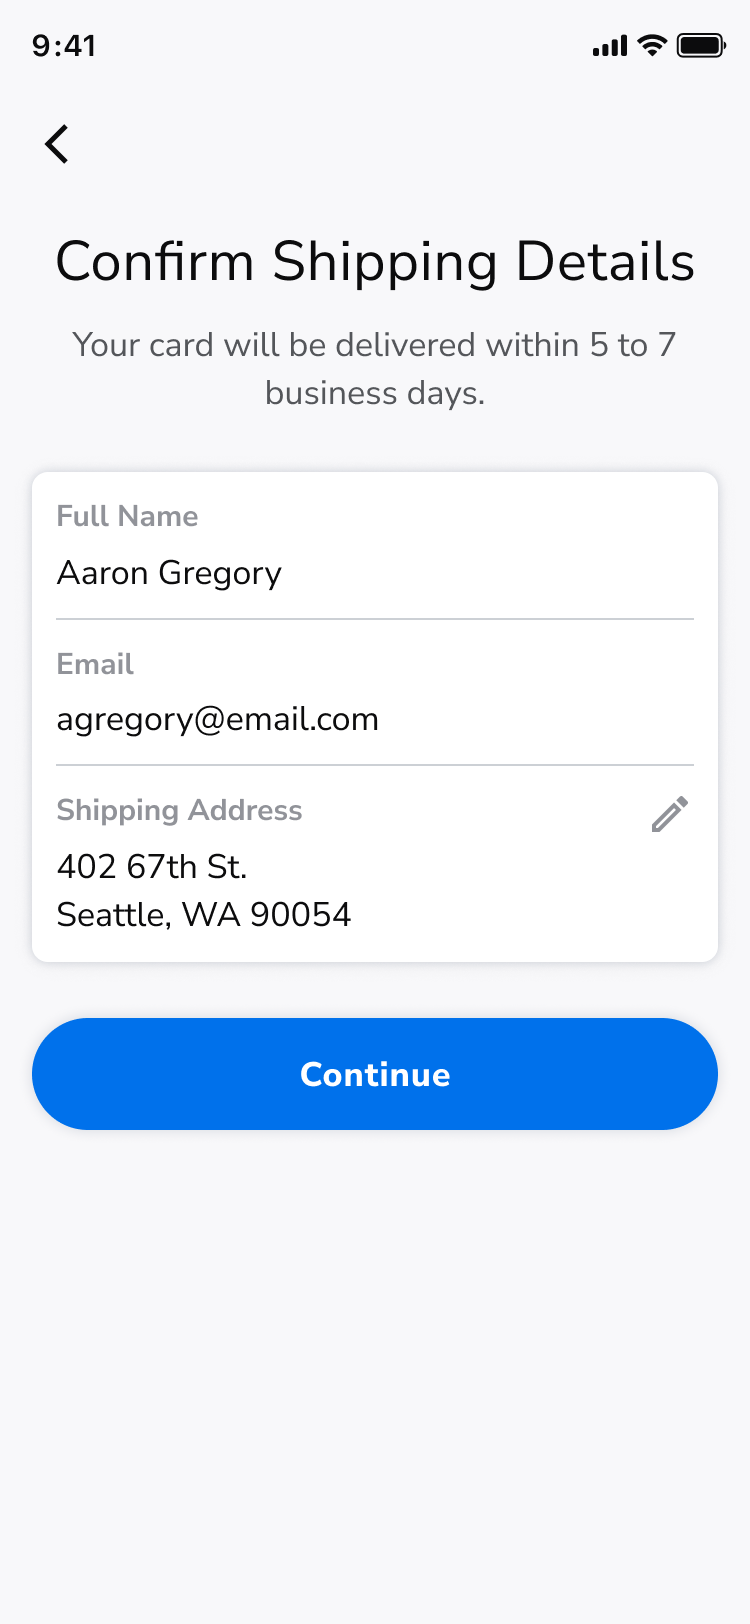
Step 3: Card Selection & Ordering
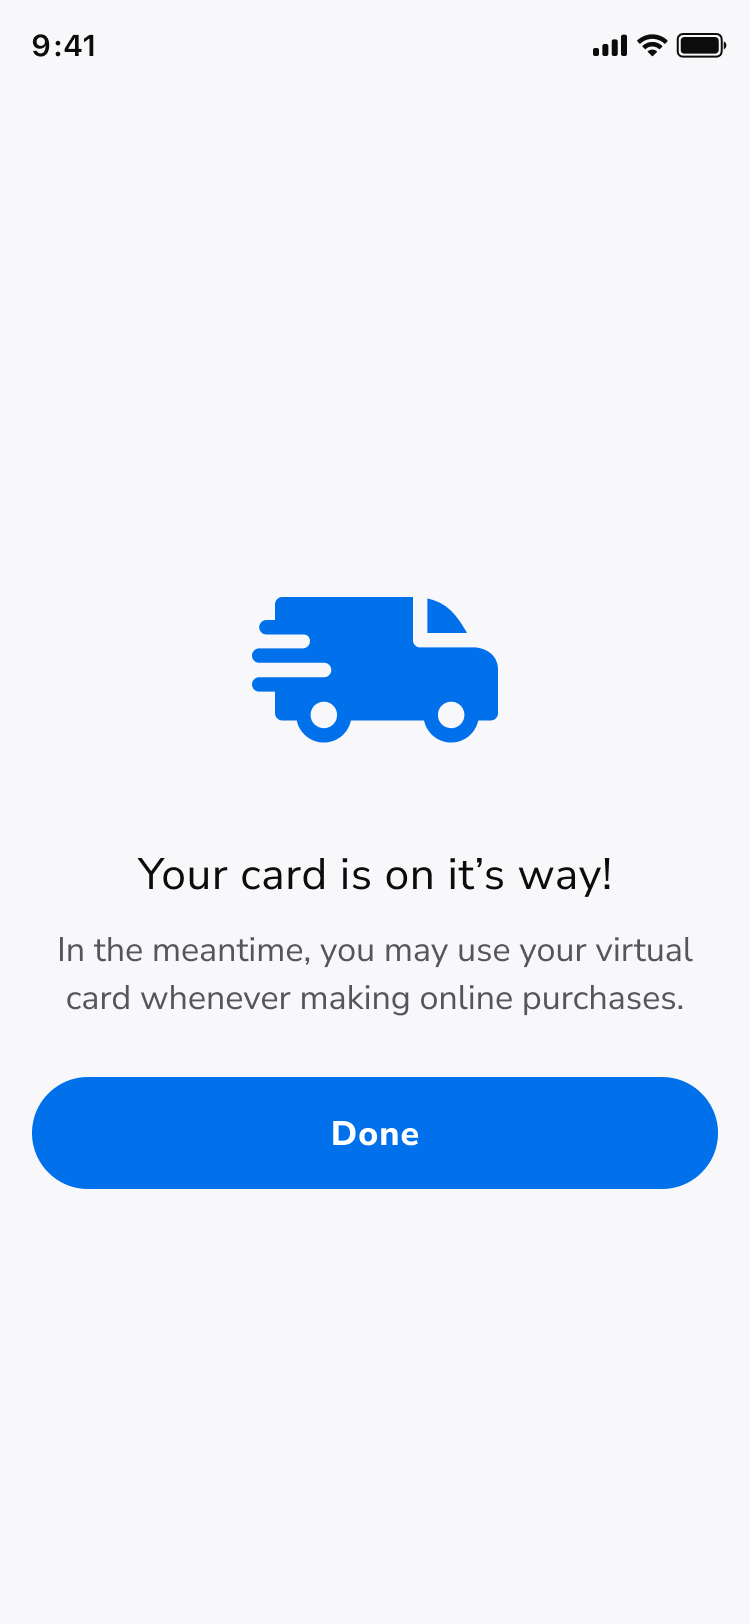
A user will naturally be sent through to order either a digital or physical card. If they select a physical card they will be asked to verify their shipping address. Once they confirm their card type onboarding will be completed.
A user will see a success screen.
After onboarding completion
- If the partner has provided a redirect_url the consumer will be redirected.
- Upward will also send an onboarding-success message to parent iFrame.
- A partner can implement a listener to take action from this event.
- The consumer bank account and card may not be open at this point while we are completing the onboarding with the bank. Once the accounts and card are provisioned you will receive a webhook message called PaymentCard.Created
- If a user doesn’t order a physical to start they can order under card management. A partner can order on behalf of a user by calling the card.order API
iFrame Messaging
As the consumer completes the onboarding flow you’ll receive iFrame message from our component.
Get started page → KYC
KYC → Terms
Terms → Card Confirmation
Card Confirmation → Confirm Shipping
Card Confirmation (Digital) → on-the-way
On the way → partner
Example: View all message in the browser
Post Onboarding Display Options
Plaid + UPW
- You need a hosted link url from UPW to open the Plaid flow
- UPW will send an iframe message to the parent frame with a plaid.token event
"hostedLinkUrl": "https://secure.plaid.com/hl/ls948q0pr159oo9qq0ns8p951n5o83686q"
- After receiving the hosted link
- You’ll need to open a secure.plaid.com browser with the hosted link
- UPW plaid will send out
upwardli://plaid-linkurl schema message to notify you when to close the secure.plaid.com browser - You’ll need add a listener for this url schema (plaid completion_redirect_uri) to close the browser
- Here is the code example.
Onboarding options
Once a consumer is onboarded you have two option to display consumer account and card details.
- Embedded widget - we display the UI for you in our hosted components, you have control over the look and feel but not the layout.
- API - you query our platform for the raw data and have full control of how you display it in your own UI (beyond what is listed in the box below)
For PCI reasons you will also need to use our embedded widget for Card Display and Card Management such as PIN reset, Freeze / Unfreeze, and Lost / Stolen options.
Card Management
The card management widget is intended to give consumers the ability to view their card, update actions tied to their card (transaction history, PIN set, ATM locator, freeze a card). A consumer will also be able to view their credit score, see statements, make payments and initiate transfers.
Card Management via Embedded Widget
To display the Card Management embedded widget you will follow the same authentication steps that are used to access the initial onboarding form.
Next, you load the card management embedded component in your app using URL below and the a Customer Access Token with the api:card-management:read.
Important Parameters
Once a user has completed onboarding you will have the ability to display the card management embedded widgets. You can either pull the home screen directly or have individual entry points for each of these experiences
The details below outline the 3 primary experiences associated with card management:
- “Home” experience
- Card Management
- Card & Transaction Details
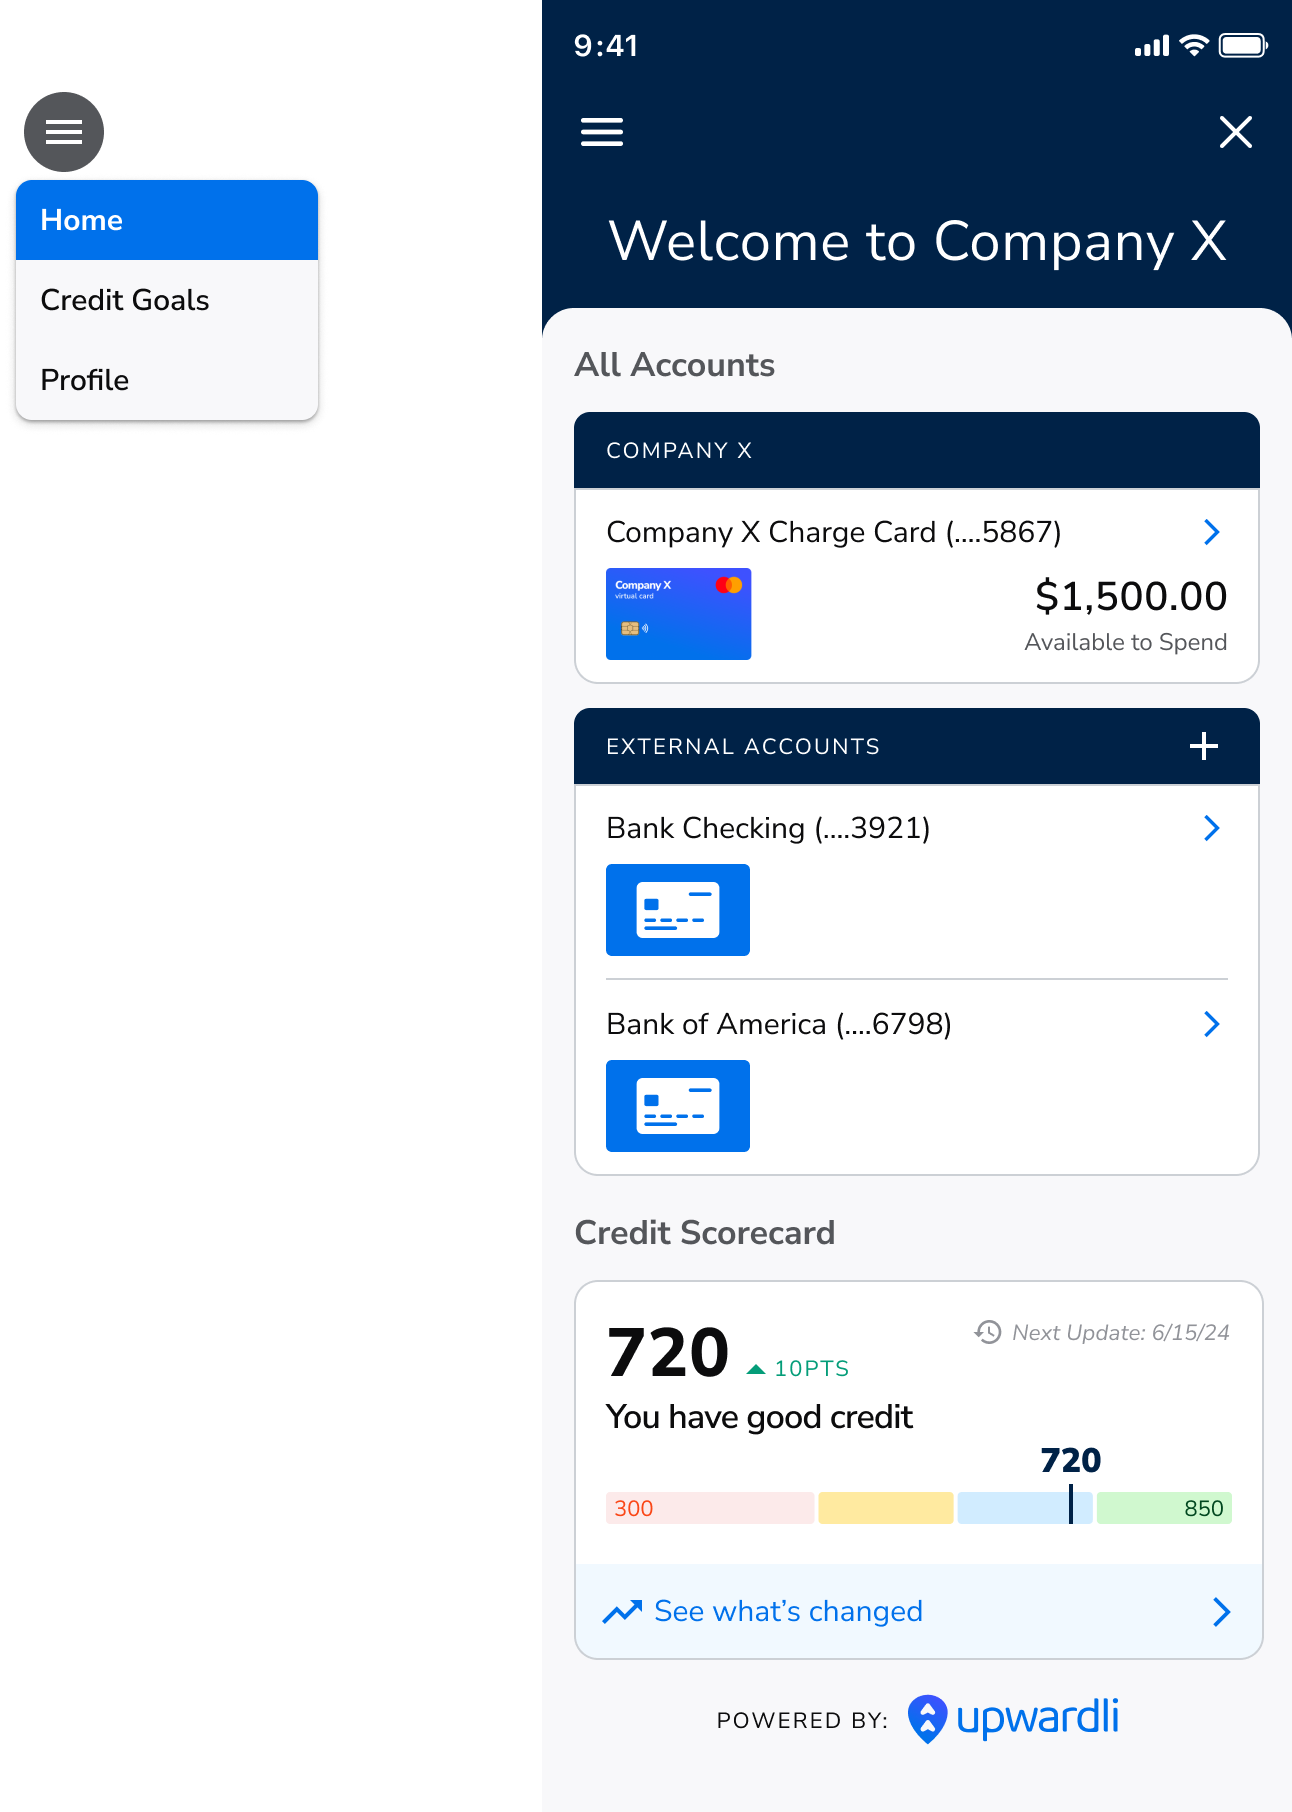
Home Experience
Home - This is the entry spot if you would like to use our home screen for users to access their card, card details, transactions, and credit goals.
https://component-embedded-sandbox.upwardli.com/card-management?access_token={access_token}
If you use our embedded components, you can still retrieve information via our APIs.
Card Management via API
When using our API method post onboarding you will be able to pull specific information regarding card details, transfers, credit insights and other actions directly into your app or website. The only two areas where you will need to use our standalone embedded widgets are (1) card image and (2) card details (i.e PIN set, freeze card, etc).
Authentication
You will need to authenticate to get access to the APIs you will use the URL below and the a Partner API Token with the applicable API url.
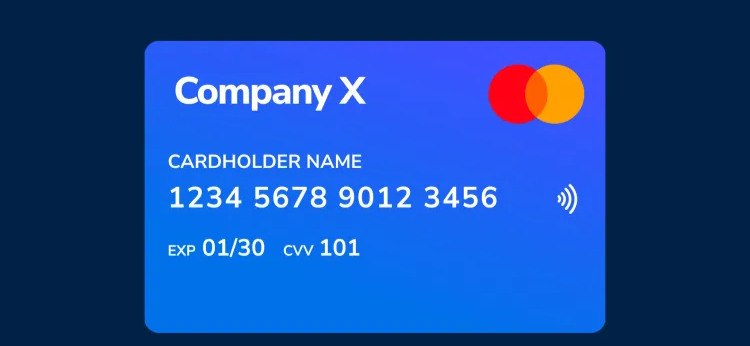
Important ParametersCard Image
This entry spot will provide a PCI compliant way to display the card image and transaction details for the user. A user will be able to add their card details to their Apple or Google mobile wallet manually. In-app push provisioning will be available in 2H 2025.
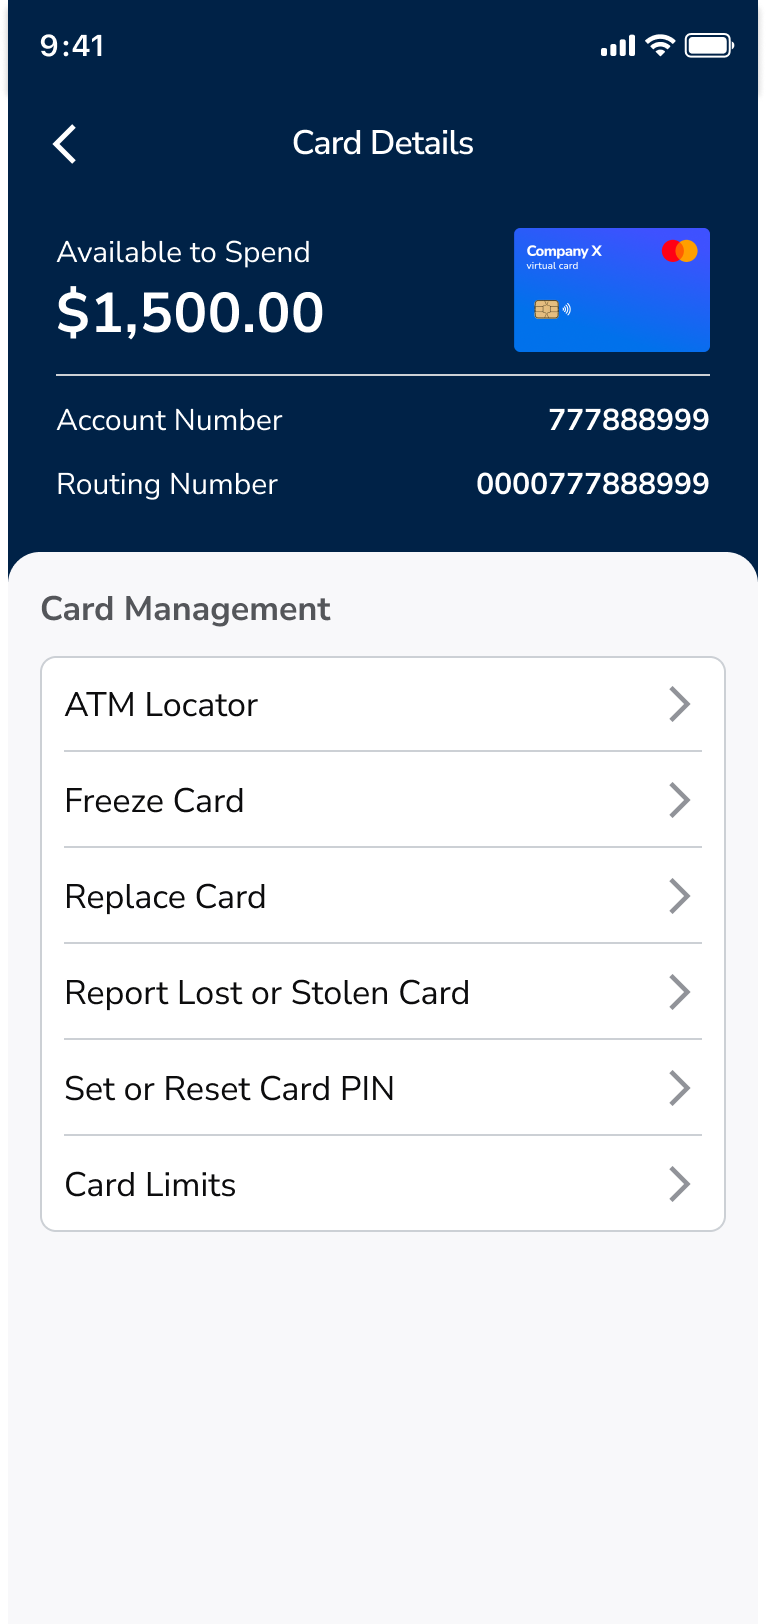
Card Details
This entry spot will provide a user the ability to manage the access to their card, freeze / unfreeze a card, reset a PIN, etc. From this screen users can also view their DDA account and routing numbers to facilitate external transfers or direct deposits to their accounts.
Related API Table
Below is a list of the API calls used to populate the Card Management embedded component.
Example: Payment Card
GET https://api-sandbox.upwardli.com/v2/consumers/{consumer_id}/payment-cards/
Response
Example: Bank Accounts
Get bank accounts
GET https://api-sandbox.upwardli.com/v2/consumers/{consumer_id}/accounts/
Response
Get partner fbo account
GET https://api-sandbox.upwardli.com/v2/partners/{partner_id}/accounts/{account_id}
Response
Create bank account
POST https://api-sandbox.upwardli.com/v2/accounts/
Response
Delete bank account
Put https://api-sandbox.upwardli.com/v2/accounts/{account_id}/
Example: Credit Insights
GET https://api-sandbox.upwardli.com/v2/credit-insights/{consumer_id}/summary/
Response
Example: Transactions
Note: payment_card_id is not bank account id
GET https://api-sandbox.upwardli.com/v2/payment-cards/{payment_card_id}/transactions/
Response
Example: Create ACH
POSThttps://api-sandbox.upwardli.com/v2/payments/ach/
Example: Create Partner transfer
POSThttps://api-sandbox.upwardli.com/v2/payments/transfer/
Note: if pre funding is enabled set status to “pending”. Pre funding is disabled by default. Contact your POC at UPW to get it enabled.
Example: Fund Card
Note: payment_card_id is not bank account id
Example: Simulate Card Auth
Note: payment_card_id is not bank account id
Example: Simulate Card Settlement
Note: payment_card_id is not bank account id
Example: Close Upward account
POST https://api-sandbox.upwardli.com/v2/consumers/{consumer_id}/cancel-account/
Card Actions
Freeze
Note: payment_card_id is not bank account id
POST https://api-sandbox.upwardli.com/v2/payment-cards/{payment_card_id}/freeze
Unfreeze
Note: payment_card_id is not bank account id
POST https://api-sandbox.upwardli.com/v2/payment-cards/{payment_card_id}/unfreeze
Lost or Stolen
Note: payment_card_id is not bank account id
POST https://api-sandbox.upwardli.com/v2/payment-cards/{payment_card_id}/replace-lost-stolen/
Replace Card
POST https://api-sandbox.upwardli.com/v2/payment-cards/{payment_card_id}/reissue/
Rewards
The rewards embedded component displays a consumer’s rewards along with location-based offers. To load it you will follow the same authentication steps used for the other embedded components, using a Customer Access Token (user scope token).
Important Parameters
Note: latitude and longitude are optional, but both must be provided if you want the consumer to see location-based offers.
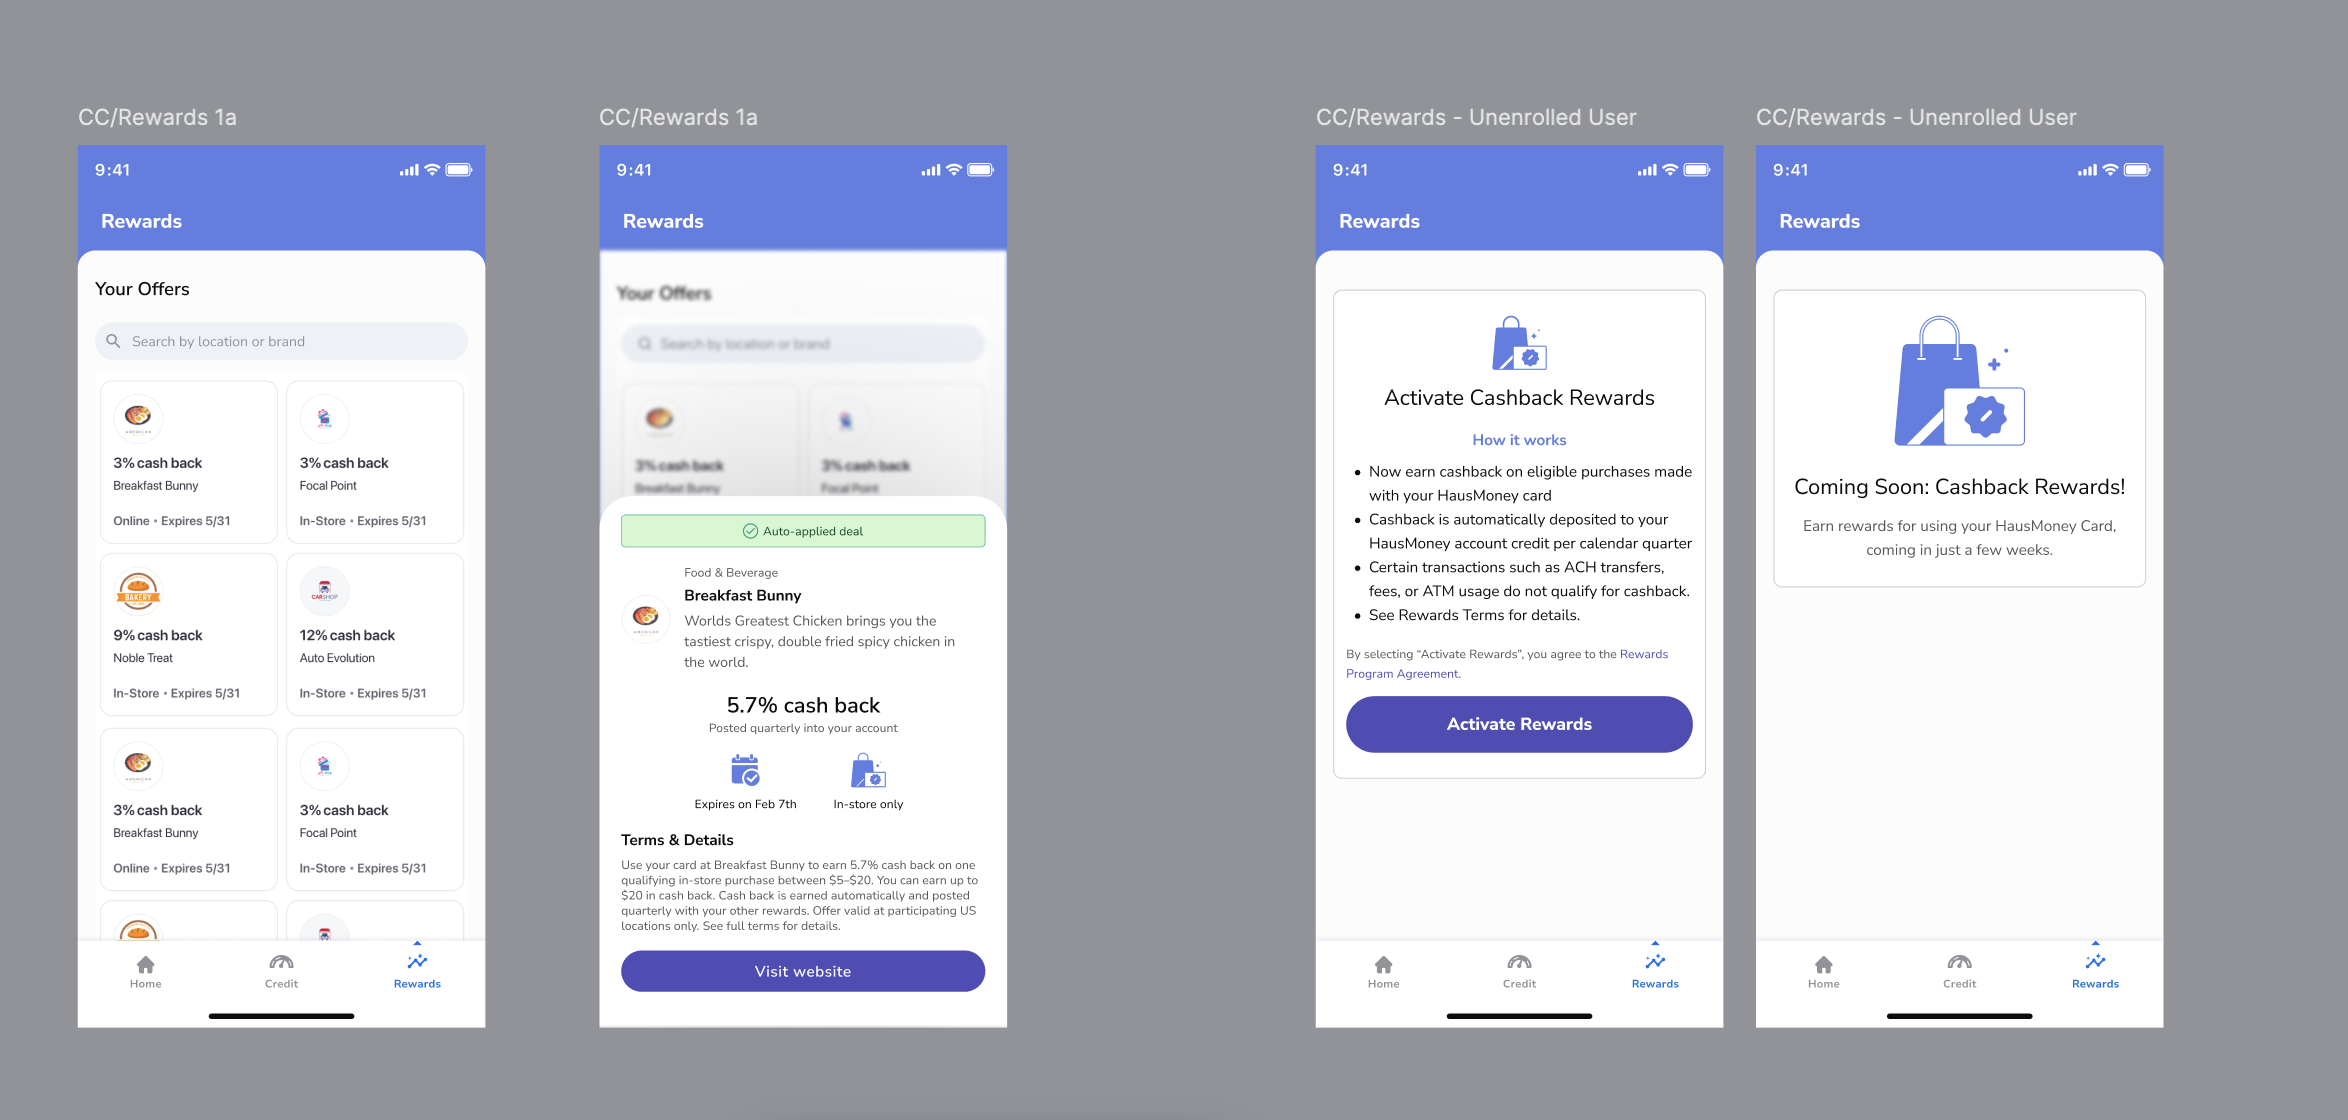
Visit website (iFrame message)
Each offer may include a websiteUrl. When a consumer opens an offer’s detail view
and taps Visit website, the rewards component does not navigate away on its
own — instead it emits a component.link iFrame message to the parent application.
Your app must listen for this message and open the URL (for example, in a new
browser tab or an in-app browser).
Message
Listening for the message
When the component runs inside a React Native WebView, the same payload is
delivered through window.ReactNativeWebView.postMessage as a JSON string.
Parse event.nativeEvent.data and handle component.link the same way.
Credit Goals
Credit Goals via API
Example: Credit Insights
GET https://api-sandbox.upwardli.com/v2/credit-insights/{consumer_id}/summary/
Response
Profile
Important Parameters
Profile via Embedded Widget
Profile via API
Example: Statements
GET https://api-sandbox.upwardli.com/v2/consumers/{consumer_id}/statements
Example: Download statements
GEThttps://api-sandbox.upwardli.com/v2/consumers/{consumer_id}/statements/{pdf_filename}/download
Example: Create dispute
POSThttps://api-sandbox.upwardli.com/v2/consumers/{consumer_id}/dispute/
Example: List dispute
GEThttps://api-sandbox.upwardli.com/v2/consumers/{consumer_id}/dispute/list/
Example: Get dispute
GEThttps://api-sandbox.upwardli.com/v2/consumers/{consumer_id}/dispute/{dispute_id}/
General API information
If you are utilizing the API approach you will also want to access other APIs for requesting specific information about Upward resources
Using the Upward Webhooks
By design we do not include extensive information about the webhook data sources. To learn more about the object referenced by the webhook, you can use the url[s] in the webhook body to make api requests.
Available Webhooks
Webhook Message Description
All Upward webhook messages use the same format. To learn more about the resource(s) that are referenced by a specific webhook message, you can make an API request to the url(s) inside of the resources property.
Webhook Authentication
Upward’s webhooks are secured using a Hashed Message Authentication Code (HMAC) in the webhook message header. The name of this header value is Upwardli-Signature. The Upwardli-Signature header contains two comma-separated key-value pairs encoding information about the request.
The first key-value pair will be in the form t=<unix_timestamp> and represents the unix time that the request was sent. The second key-value pair will be in the form v1=WeNeedSomethingHere, where the signature is a sha256 hash computed from the consumers webhook secret and a dot-separated string composed of the unix timestamp joined with the request body.
Note: computing the signature is sensitive to the exact characters input into the algortihm. The request data should be a json string with no whitespace formatting.
Sample Data
Example decode in Python
Registering for Webhook Messages
POST https://api-sandbox.upwardli.com/v2/webhooks/registrations/
Header
Example Request Body
Get All Webhook Registrations
GET https://api-sandbox.upwardli.com/v2/webhooks/registrations/
Header
Example Response
Change Log